Saturday 31 December 2022

2023

2023, the year of the rabbit


The zodiac sign Rabbit "represents good year and patience in Chinese culture, which means that the Year of the Rabbit 2023 will offer us the tranquility and success we were missing in 2022. The impact of the rabbit will moderate those who are very reckless or have their heads in the clouds. Because of this, you can successfully carry out your ideas if you deliberate before acting."
or
"As rabbits live peacefully in groups, this symbol represents “well-being of a family”. It also represents “great progress in business” because of the way they leap forward."

So, yet another Covid year is behind us. Japan has currently a daily average of 300 deaths due to Covid but the event of the year in the country was the assassination of the former PM Abe. 
More horribly, this year, the Russian invasion of Ukraine is still ongoing with no end in the immediate future. Let's hope the Ukrainian people will show the same strength in 2023 and victory and peace to come quickly with the whole country back under the blue and yellow flag. SLAVA UKRAINI!

Unfortunately, no new Arawasi publications this year, but we manage to put something together for Osprey, due next May.
Don't expect a publication as good as our Eagle Eyes, though. We promise to give the bomber the attention it deserves some time in the future. 
Meanwhile, rest assured we didn't stay idle this year and new releases are forthcoming.

This blog did not do so well in 2023. We had very few contributions and there is a feeling that the interest is wavering. Regardless, we will persevere and hopefully, you will find something you like here in 2023 as well. 
Our FB page is doing great though. So perhaps you prefer this medium? 

As always, a HUGE "thank you" to our good friends:
Sinang Aribowo, James Boyd, Devlin Chouinard, Jan Kaňov, Danilo Renzulli, Zygmunt Szeremeta and Eric Vogel. AND JEAN BARBY!!!!

All the best for the new year to everybody out there.

Wednesday 28 December 2022

Heads Up! - Mitsubishi Ki-21 Model 1 Ko from ICM

ICM announced that the Mitsubishi Ki-21-1a or Model 1 Ko in 1/72, is forthcoming!!!
The box cover depicts the very first pre-production aircraft built by Mitsubishi, when it served with the 60th Sentai in the China front. Not in Manchuria, as Thorpe has captioned all the 60 Sentai photos in his book. The 60th Sentai never served in Manchuria. As we first showed in our book, the particular paint scheme was not a "pattern" for the "Sallys" as Thorpe had suggested, but only the first 2-3 pre-production Ki-21s were painted this way by Mitsubishi. Soon after these first few camouflaged examples, Mitsubishi and Nakajima started producing "Sallys" in overall hairyokushoku. These were sometimes, but not always, camouflaged at the unit level. Most remained in overall hairyokushoku.
Photographic evidence we obtained after the publication of our book, confirms that this particular aircraft did not have any fuselage windows whatsoever! There were no windows on the port, starboard, or ventral positions, and therefore no gunners. This changed when the Model 1 Ko went into full production, and windows were added on the starboard side and in the ventral position. No side gunners were included though.
Nine Nakajima-built Model 1 Kos were delivered to the RTAF, so hopefully, this new kit will include appropriate decals with roundels and elephants in red squares. 
I also hope the kit will include decals for civilian M-21 "Sallys".

Monday 12 December 2022

ICM Mitsubishi Ki-21 "Sally" in 1/72 by George Eleftheriou - W.I.P. pt.1

ICM very kindly presented Arawasi with their wonderful brand new "Sally" kit and I'm going to build it Out-Of-The-Box. Really happy with their present and can't thank them enough.
The box I received included, apart from the kit, a set of ICM paints for it. Great surprise and can't wait to try them out.

The instruction sheet.

Here we go. Very clear instructions and the parts fit quite nicely. 
Some imperfections were quickly fixed with drops of Mr Surfacer 500. 

The side windows must be masked inside and out before any paint is applied. Hmmm...

16/12 Update:
Made quite some progress and finished, give or take, the cockpit and the starboard side of the fuselage.
There are some tinny tiny parts like D5, D45 and D11 I'm not sure I understand the point of having them separately and asking the modeller to handle and glue them. They would make sense in a 1/48 kit but in 1/72 I think they are unnecessarily complicated challenges. Same with the fuselage interior side wall and the tail. What's the point of including these parts separately?
I appreciate the inclusion of the seat pillow for the pilots but the back pillow should also have been included. And it would have been much better to include seatbelts too.  

There are issues if you follow the instruction to the letter and, once done, then paint the whole interior before closing the two halves. Step 2 needs you to attach decals, which means you cannot paint this part afterwards. And there are a bunch of windows in the rear of the fuselage that will need to be masked first if the interior is to be painted.
So, best to paint the interior at this stage and then attach smaller "movable" parts like the windows, the bomber's aim or the machine gun spare magazines.

20/12 Update:
Okay, "short" update today.
I finished the base colour for the fuselage interior. I decided to use the Vallejo paint you recommended. This time I used AK11900, which according to the bottle, is " BRAND NEW FORMULA 3rd GENERATION"...that "beats any other acrylic type paint". 
I've been struggling the past few days with the damn thing and I had to spend quite some time I'll never get back, disassembling and cleaning three different clogged airbrushes about a dozen times. I always got "spider webs" and...yes, I know, maybe it needed more or less thinner, different pressure settings for the compressor or different size needles or maybe I didn't shake the bottle enough or too much or maybe it's because I didn't use a "retarder". OR maybe I should have used my good old MrColor paint instead! How about that!
In the end, it came out not bad at all and I like the colour hue but this is the very last time I'm buying Vallejo paints. I'll try to use what I've already bought but never again. Modelling is supposed to be fun and this exercise definitely wasn't. I know many of you guys love Vallejo, you're used to them and can achieve great results. Good for you but for me, no thank you. For a novice modeller like me, Vallejo is too fastidious and finicky for my tastes with too many parameters that could go wrong. So, I'll stick to Tamiya and MrColor I know and trust. I'll try mixes of MrColor H-54 and Tamiya XF-50 to bring them closer to the Vallejo hue and we'll see about the results.

Saturday 26 November 2022

Tachikawa Ki-9 "Akatonbo" (Spruce) in 1/48 by George Eleftheriou - W.I.P. #2

In this second part, I will work on the cockpits of the other "Akatonbo" kits and try to make them more accurate.
As you perhaps know, apart from the prototypes, there were two "Spruce" models that went into production; Model Ko & Model Otsu (the latter was never called "kai" as Francillon mentions in his book entry). Their main external difference was in the design of the landing gear.

Tachikawa Ki-9 Model Ko

Tachikawa Ki-9 Model Otsu

But there were also differences in the cockpits. 
The illustration on p.20 in FAOW#73, shows what the cockpit of the Ki-9 Model Ko looked like. 


I'm confident it was based on the type's maintenance manual, and you can see various accessories, like bags that were not included in the Otsu.
We have in the Arawasi collection an original copy of the maintenance manual of the Model Otsu.

The Otsu manual does not include any overall cockpit illustrations like the one in the Ko manual and therefore we don't know for sure what exactly the Otsu cockpit looked like. But all Japanese sources agree that the cockpit of Model Otsu was much simpler than that of Ko, with various unnecessary accessories and features removed.
These manuals included all the features and accessories of the particular aircraft type and model accompanied by detailed illustrations to help the maintenance crews to service the aircraft. 
The manual for the Model Otsu does not include any electric system. There are no batteries or switchboards, as seen in the cockpit illustration of Model Ko and included in the Nichimo kit. 
There are no oxygen bottles behind the seats. These would be useful during higher altitude training, but this did not happen with the "Akatonbo"; high altitude training was undertaken with the Tachikawa Ki-55 "Ida".
The Otsu maintenance manual shows what the seats looked like.

Below is a photo of an original "Akatonbo" Model Otsu seat, courtesy of Kojima-san. 
The differences between the actual seat and those of the Nichimo kit are apparent.

The kit includes a pair of interesting control sticks. Again these were for the Model Ko, not the Otsu
Below is the manual illustration for the control sticks of the Otsu.

And a vintage photo that confirms the illustration.

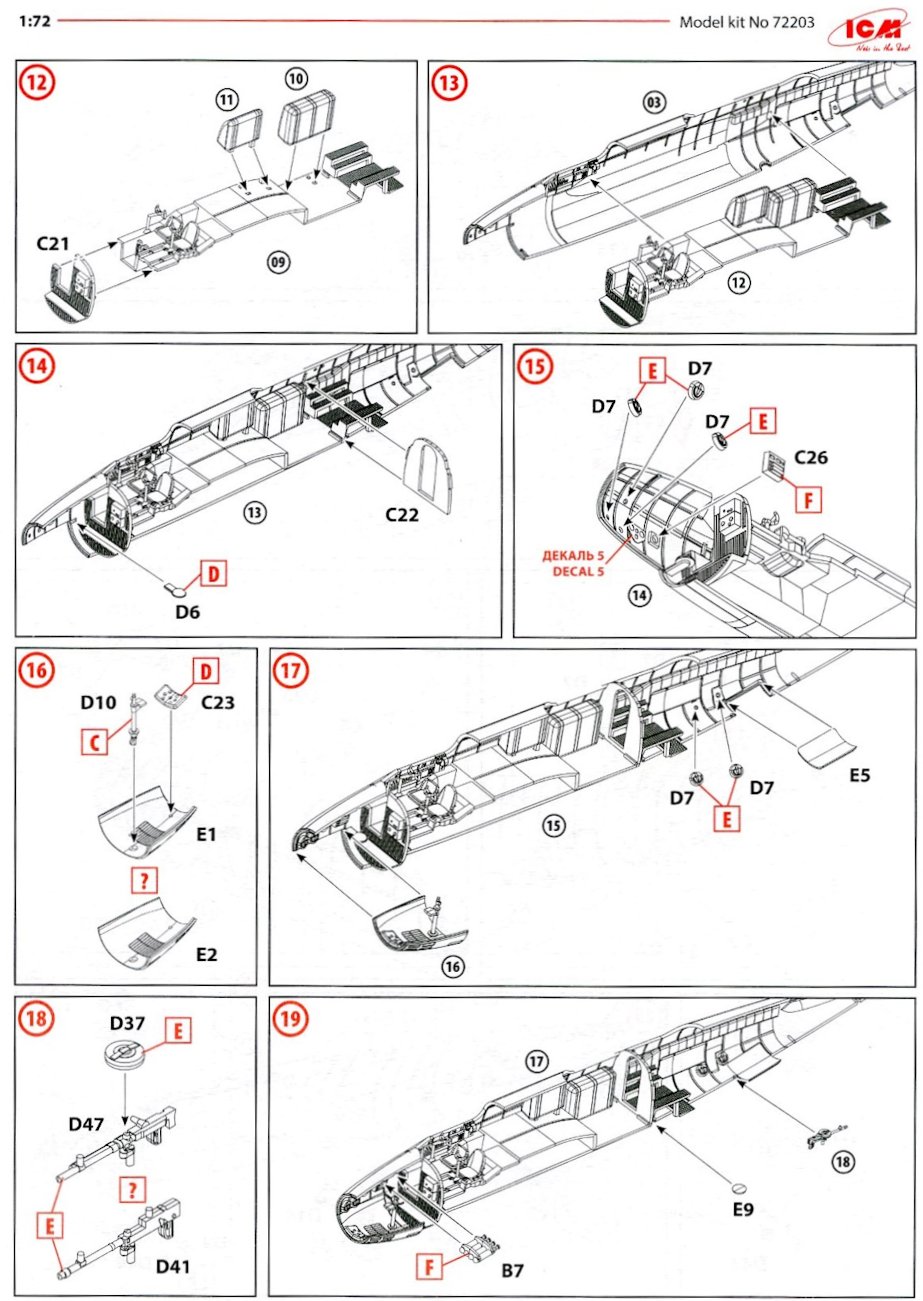
Below are the Nichimo kit instructions in English.

In my opinion, the cockpit of the Model Otsu was very similar to the cockpit of the Tachikawa Ki-17, as can be seen on p.79 of FAOW#73. Basically nothing on the starboard side of the cockpit and only controls on the port side. 

I decided to remove all the switchboards and stuff on the starboard side of two "Spruce" models and keep the switchboard, only on one of my "Spruce" models. The logic behind it is that the switchboard was used to power the electrically heated pilot uniform and perhaps some "Spruce" had this feature for the schools that flew the type in cold climates, like in Manchuria. Unlikely, but what the hell.
I also modified the pilot seats as best as I could. First I tried to hollow out the bottom of the seat but in the end, opted to remove it completely and add a styrene piece. I also opened some holes in the seat sides, removed everything from the back of the seats and added two styrene rods.
Some seats turned out quite nice, some less so. Next year, when I buy my own 3D printer I'll try to create even more accurate and crisp seats. Yes, I have more "Akatonbo" models in my collection. As I said, I simply love this plane.
I also worked on new control sticks. I thought a lot about how to do it and in the end, I opted for the easiest option. A single 1mm styrene rod, lightly cut and bend the top and then file the top end until it looks like a handle. I think they turned out great. The bottom of the stick is supposed to end in a hole, as seen in the Ki-17 interior (FAOW #53, p.79). Highly unlikely that there was only a hole. If something fell in, it would be a bitch to remove and could mess up the controls, something not desirable at all. Taking into account other IJAAF and IJNAF a/c, I think the bottom of the stick was wrapped in a leather pouch. No photos to confirm this, though, so I decided not to waste more time on this and just glue the stick to the cockpit floor. Not the best looking, but hopefully will be able to fix this detail too with my 3D printer.  

I wanted to test your suggestions for the interior blue (hairanshoku) and this morning, after some acting up from the airbrushes, I finished one side of the cockpit.


The top paint is AK Interactive's RC329 hairanshoku (Grey Indigo). Not easy to find in Japan, mind you.
Middle is Tamiya XF-50 Field Blue.
Bottom is MrHobby H-54 Navy Blue.

Here's how the finished cockpits look now.

I think I like the tone of the AK paint the best. MrHobby's Navy Blue is just a little bit too dark and Tamiya's Field Blue is somewhere in between. All of them are not bad at all though.

I used Tamiya's panel accent and weathering master for weathering and Gundam marker silver. Note the seat backrest pillow was filled with kapok and wrapped in leather. The seat arm sides were also covered with leather. 
The seatbelts are from Fine Molds and I absolutely hate them. They bend completely straight, you can never know where exactly they will fall when bent and, in the end, they look quite unnatural. I have yet to find a satisfying set of seatbelts. One of the things to work on when I get the 3D printer.

11/12 Update:
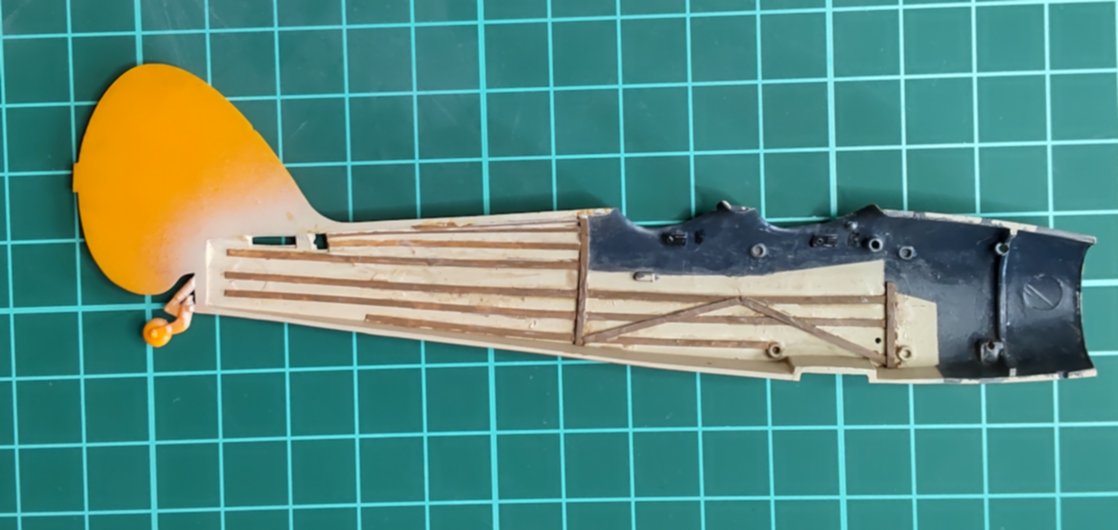
Okay. Finished the interior of all four "Akatonbo" kits. This time I used much thinner styrene, 0.5X0.75, for the stringers and the result is a lot better. I painted the fabric with MrHobby H-85 "Sail Color" and the stringers with Tamiya XF-78 "Wooden Deck Tan". The metal part of the interior is painted, from top to bottom, in MrHobby H-54 Navy Blue, Tamiya XF-50 Field Blue and AK Interactive RC329 hairanshoku (Grey Indigo). I still prefer RC329 but the paint gave me some grief with the MrColor Thinner 400.

Question: what's the difference between RC329 and AK11900? Both are named "hairanshoku".

I worked more carefully and properly on the interiors of the other three kits. I drilled teeny tinny holes (very easy to cover with Mr. Surfacer) where the stringers are visible on the exterior and on the corners of the metal parts. These guided me to place the stringers and figure out the exact outline of the metal parts in the interior. Otherwise, it's next to impossible to see through the plastic. I'm much happier with the end result now and in comparison, the top out-of-box effort I built first, looks absolutely horrible. Well, what can you do? 

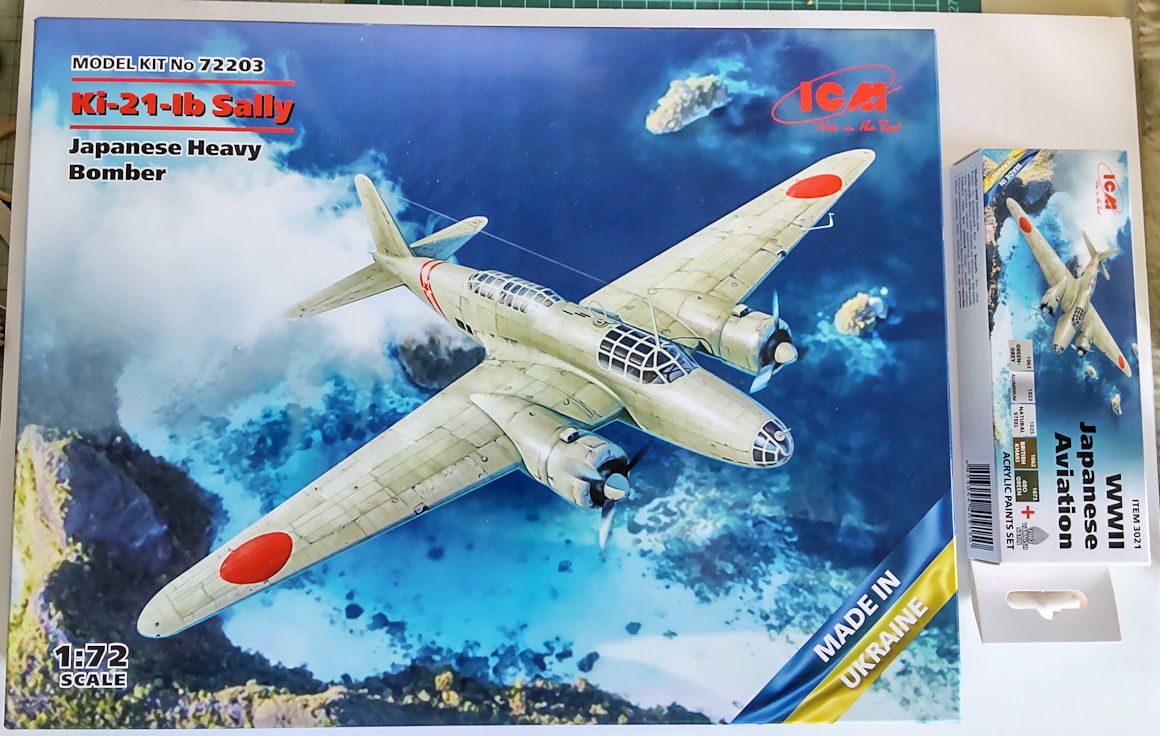
Also, "Sally" is here (yeah baby!!!!) and I'm starting working on her this Monday. I won't put "Spruce" aside so both projects will get updated.

Thursday 17 November 2022

Tachikawa Ki-9 "Akatonbo" (Spruce) in 1/48 by George Eleftheriou - W.I.P. #1

While waiting for my brand new "Sally" to arrive directly from ICM, I'm starting this thread to present the building process and the final results of 4, yes four, different Nichimo Tachikawa Ki-9 "Akatonbo" (Spruce) in 1/48, in a variety of markings.


The first kit will be almost out of the box because this is the very first bi-plane I'm ever building. Let's see the instructions for the cockpit.

Here's what I did.

Didn't change anything at all. The parts have some flash and they are really fiddly and delicate to work with. Let's see what the painting instructions say.

All the metal parts should be painted "aotake", actually IJA blue-grey, and the instruments on the fuselage side, black. Before I add the seats I need to paint the cockpit. On second thought, perhaps it would be better to paint the instruments and the fuselage sides first before assembling the "cage". I will do that in the second "Akatonbo".
I used MrHobby H-54 Navy Blue for the overall interiour colour, which I find the closest out-of-the-bottle paint for IJAAF aircraft. Red-brown for the leather parts. Washed with black, gray and brown Tamiya panel line accent. Also, dry-brushed silver to show scratches and weathering.
All in all, I think it looks quite nice.
After I add the pilots I think there won't be many details visible; we'll see.

21/11 Update.
I spent the weekend and most of Monday morning working on the fuselage interior. I wanted to accurately paint it and the kit instructions were quite accurate; the metal parts of the interior should be painted in "aotake" blue and the fabric surfaces in flat white. There are no known photos showing exactly how the whole cockpit of the "Spruce" looked like but from two photos I found, I could confirm the kit's instructions. The photo below from NARA was one.


A close-up of the cockpit area reveals that there is a darker area corresponding to the metal part of the cockpit and a lighter area corresponding to the fabric.

The main problem is, the kit doesn't help at all and after a lot of trial and error, I managed to paint the interior somehow accurately. Not 100% happy with the result though and I will try to improve things with the next kit. Anyway, I used a mix of white with a little buff to show the canvas but, again, I'm not entirely happy with the results. If you have any ideas about a good off-the-bottle paint for canvas, leave a comment. 

I also wanted to show, as best as possible, the stringers that held the fabric in place. I hadn't done this before and found the process particularly tedious. Keeping in mind that the cockpit frame is a very tight fit with the fuselage, I initially tried masking tape but it was very difficult to handle. I opted for sheet styrene strips of 0.38X1.00mm. They look okay but I have a feeling they should be thinner. 
Anyway, the way the stringers were arranged was also a mystery but, again, the photo above helps a lot.

You will notice that the wooden stringers are in contrast to the darker metallic frame further inside the fuselage.

While the stringers in the rear of the fuselage are clearly shown in the photo above, I had again difficulty finding what the stringers around the cockpit looked like.
Two different NARA photos give somehow conflicting hints.
Are the vertical cockpit stringers straight, at an angle or in reverse V?
I found the bottom photo first and built the starboard side of my model accordingly. But then I found the top photo and built the port side differently; BS ofcourse, don't follow my example.
Here's what the interior looks like now before I attach the cockpit and close the two halves.

Naturally, I'm far from happy with the result. But it was a learning experience and I hope the next "Akatonbo" models to be better. The silver lining is that the way the cockpit is painted is fairly accurate (metal parts are in blue, the canvas is painted as such and the stringers are in wood colour) and once the pilots are in there, very little of the mess I made will be seen.

In the next instalment, I will build the cockpits of the three other "Akatonbo" correcting the various mistakes of the kit. This one was out-of-the-box, the next ones will be far more accurate and hopefully more good-looking.