Sunday, 14 September 2014

Mitsubishi J2M3 "Raiden" (Jack) by Bernhard Tomaschitz - WIP#5

The fifth part of building SWS J2M3 Raiden.
This contains all missing steps according to the manual. Except complete assembly.
The a/c is painted and got decals. Weathering is not finished. External parts are all done and completed and painted. Not all parts are yet assembled.
The decision for the a/c was easy done, since the a/c with the lightning looks great. Question decal or painting? I started with cutting the decals and reproducing them for masking from masking sheet from Tamiya. It worked out good. So I decided to spray the lightning. To spray the hinomarus, I tried to avoid the task of masking the white outline. The error which may ruin the model is an eccentric hinomarus, which happened to me at a Ki-43. The decals have a very thick film. Therefore I removed the film of the decals for the hinomarus. The setting of the decals without film is very poor. Here Zoukei Mura could improve drastically on the quality of decals.
What did I find to improve?
• The aerial. Where does the wire start at the fin? Where does it end? What about the wire which leads to the radio compartment?
• The lighting of the cockpit does not exist. Like in most kits of a/c. The pilot who is flying an a/c needs to see the instruments. To read it. Lighting is necessary in every cockpit. Like Oxygen.
• Oxygen equipment is not here, but just the bottles.
• What can I learn out of it? The guys from Zoukei Mura should learn to operate an aircraft, so they can find out by themselves, that the wonderful kit represents now just the grounded a/c in the museum. There are some gaps to the real a/c. Some details like this mentioned are missing.
• How about mirror equipment in the hood? I do not know it. Does anybody know something about it?
• The installation of the external fuel tank I do not understand. Since manuals and drawings show a different mounting. Does anybody know more about it in detail?
The last part will show the assembling and the weathering.


Friday, 12 September 2014

Nakajima Ki-84 "Hayate" 104th Sentai by Jean Barby

Here is my latest built, Hasegawa 1/48th with the FM cockpit, Ultracast seat and CMK armament set. The flaps were put back in the closed position as normal on the ground and the whole model was riveted. The chipping effect is due to the hairspray technique and worked just fine! This Ki-84 is a 1945 series and she wears the same colour close to olive drab colour in the cockpit, on the prop/spinner and on the upper surfaces. Decals are from Lifelike n°1 set on the "Hayate"!
Jean Barby
 
An exquisite model as I'm sure you will agree with excellent weathering. Merci Jean!


Tuesday, 9 September 2014

Aichi E8A1

A few weeks ago I purchased a postcard with two photos. One had Hokoku#68 but the other featured a much more interesting aircraft; the only known photo of the Experimental 8-shi Reconnaissance Seaplane or Aichi E8A1.
 
Our good friend Zygmunt  Szeremeta kindly created artwork exclusively for our blog based on the above photo.
 
Two years after the acceptance by the IJNAF of the E4N2 (here) which was based on the Vought O2U-1 Corsair, a replacement reconnaissance seaplane was sought. Back at that time it was common for the Army and Navy to simply submit required specifications and the various companies to build prototypes which were then tested and compared between them in order to find the best design. Naturally this meant a substantial wasted effort for the losing entries but the competition guaranteed high standards and quality that ultimately led to the advancement of Japanese Aviation industry.
For the E4N2 replacement, the competition included three companies: Nakajima, Aichi and Kawanishi and the requirements included to be able to be catapult launched and to have manoeuvrability equal to a fighter, the latter being particularly demanding for a seaplane.
Aichi's entry was designed by Matsuo Yoshihiro, was based again on the Corsair and was basically an improved E4N2. The Nakajima and Aichi test aircraft were very similar in performance except for manoeuvrability and stability. On those two the Nakajima design was superior and therefore it was eventually accepted by the IJNAF becoming the well-known Nakajima E8N1 "Dave".
The Kawanishi entry was the most interesting but ill-fated E8K1.
Nothing else is known about the Aichi E8A1 but Choroszy Modelbud has released a resin kit in 1:72.  

Sunday, 7 September 2014

Mitsubishi J2M3 "Raiden" (Jack) by Bernhard Tomaschitz - WIP#4

The forth part of building SWS J2M3 "Raiden" with steps 3.3 A to 3.3 H, 3.4 A to 3.4 G and 3.6 A to 3.6 D regarding the wing construction.
I concentrated in the possibility to assemble the replacement landing gear from the extra parts when the wing is finished together with photo etched parts in the wheel well.
Also, the guns from the special parts. As you can see in the photos, the outer gun barrel causes trouble. Part # 2 is wrong in shape but correct in length, part # 3 correct in shape but wrong in length. The kit parts are all perfect.
The landing flaps. The underwing is made from etched parts. First I checked the geometry of the etched parts and I found it correct. The alignment needs some grinding on the kit parts. The bonus is, when the a/c is assembled, lots of stiffness in the fuselage rear wing junction.
Troubles occurred when I put the cowling parts in place. A gap on left side of the rear cowling toward the fairing showed up. This gap is probably the result of an error which happened to me. I suppose the reason is because I assembled just one half of the fuselage to the wing, following the manual 3.4 A. Here is a chance to glue the fuselage not in the correct angle to the wing. Another result is, that the fin is inclined to the symmetry of the wings.
Everything else, the assembly of the kit and photo-etched parts is straightforward. Just the problem with the special gun part as mentioned in the beginning.


Friday, 5 September 2014

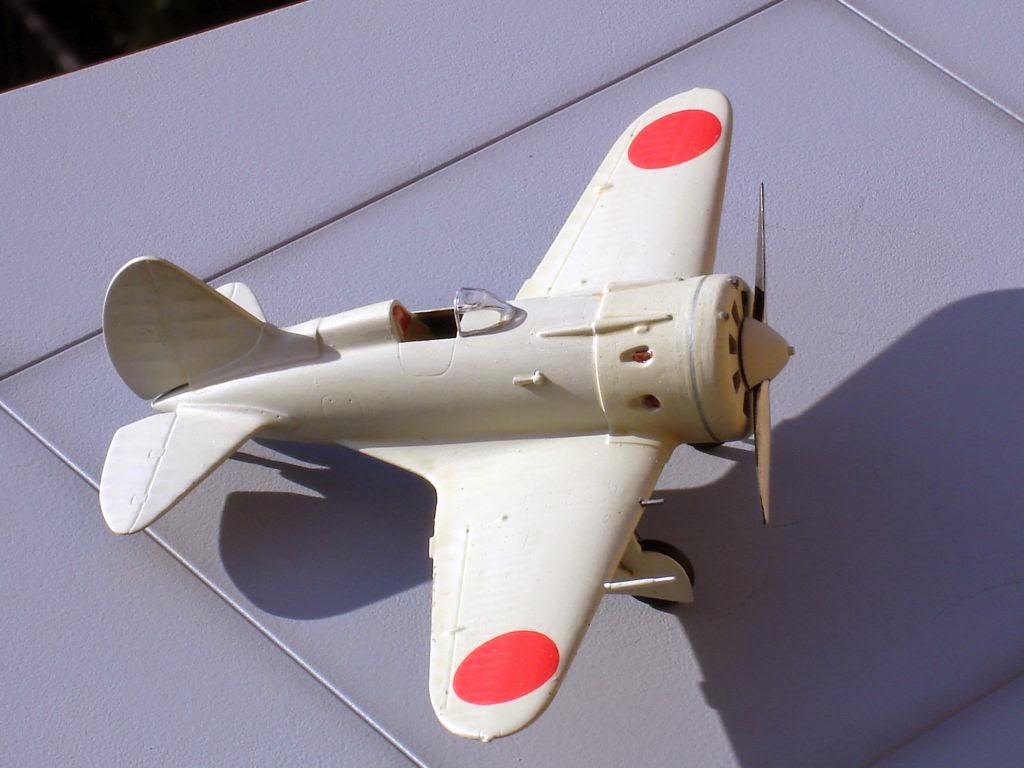
Japanese Polikarpov I-16 by Stefan Müller

Our friend Stefan Müller shared with us photos of his Japanese-captured Polikarpov I-16 in 1:72.
Kit: Hasegawa, decals: Kora, paints: Agama.


And below is a photo of a I-16 captured and displayed by the Japanese. It still carries the Nationalist China markings. Because of its small wings, dumpy fuselage and the odd sound of its Shvetsov M-25 engine (based on the Wright R-1820 Cylone), the type was nicknamed "abu" (horsefly) by the Japanese ground units in the Nomonhan area.

Sunday, 31 August 2014

Mitsubishi J2M3 "Raiden" (Jack) by Bernhard Tomaschitz - WIP#3

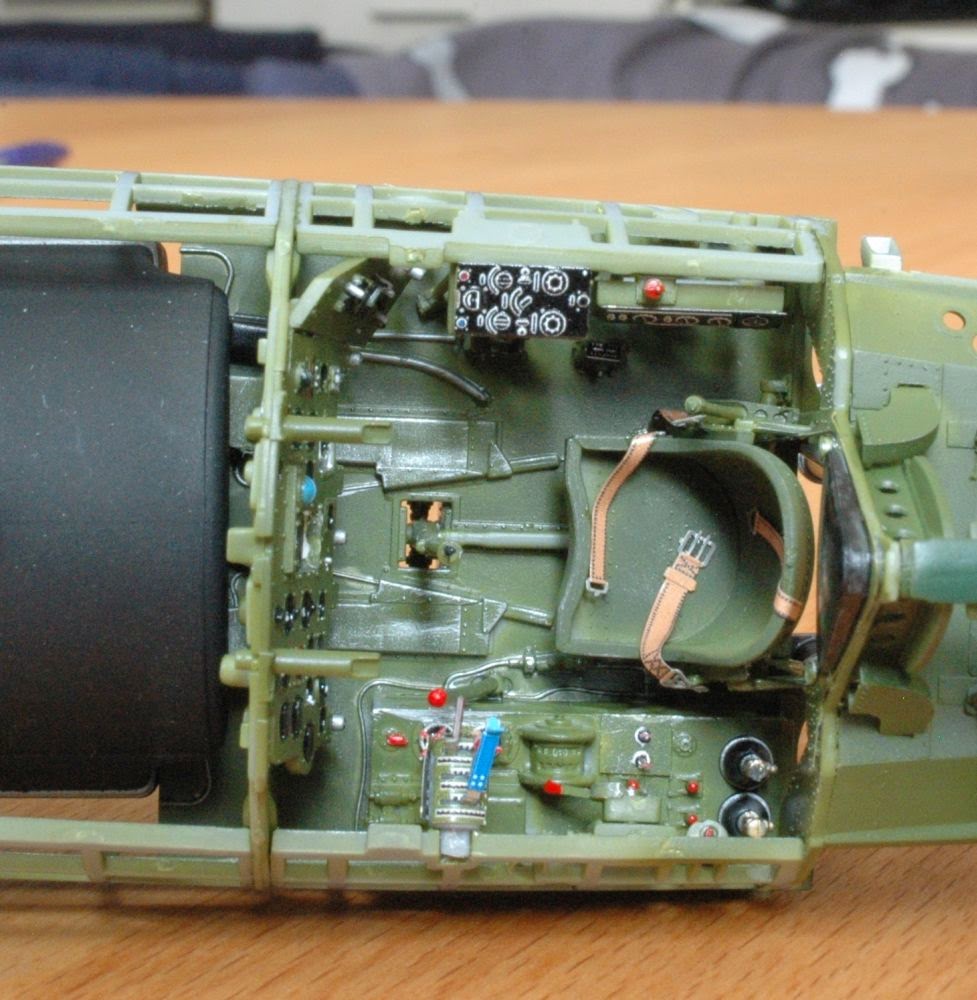
This is the third part of building SWS J2M3 "Raiden" and I'll be working on steps 3.2G to 3.2K.
The main parts are the instrument panel, control instruments like the throttle and the radio equipment. I encountered zero difficulties during the building process of the plastic parts and everything is absolutely straightforward. 
I had issues with the photo-etched parts though. Their instructions is virtually a collection of errors. Some plastic parts like C-48 on page 1of 4 top row right hand drawing, necessary for the etched parts, are not there. The instruction drawing for the bending and the installation of levers second row 1 of 4 left hand is unfortunately misleading. If you decide to follow the instructions, the levers part 18 and 19 will overlap. There should be no 90° angle, a 60° would be just fine and they should be bent according to MA#470 p. 19 top right.  I did not use the etched parts number 49 and 37, because I was very uncomfortable with the fit of clear parts due to a past regrettable experience I do not intend to go through again.


A major irritation is the fact that the photo-etched part instructions are not in some sort of meaningful order, but actually in total disorder and therefore it is easy to forget parts or actions like grinding. They broke my concentration and gave up. I'm thinking about not using photo-etched parts anymore. I feel it's a waste of energy and money. Not to mention you may end up ruining the kit.
The wonderful SWS kit, takes you smoothly through all the steps. The assembly of the front panel frame is great. So I was able to install the instrument panel on the fuselage later on as shown in the photos. The design of every part is just a dream. I would advice you to avoid at all costs to use the interior photo-etched parts. This would annoy you building the kit.
The painting instructions are good and together with my reference from MA#470 and "SWS concept note" I was able to make good progress.


Saturday, 30 August 2014

Tsukuba Kaigun Kokutai Kinenkan #3

In a separate room next to the Zero relic there is a collection of very interesting relics.
In one cabinet there are some Zero instrument panel samples from the collection of Nakamura-san.
Check HERE for his site and here for some more detailed photos.


On the other side there are some pieces from the collection of Kojima-san. Starting with half a Manshu Ki-76 propeller!

Followed by a Nakajima Ki-43 "Hayabusa" tire.

The inscription reads: "日本タイヤ株式会社 NO" (Nippon Taiya Kabushiki Gaisha NO - Nippon Tire Co. Ltd.)

"常用内圧 4.5 kg/cm2 " (Joyo naiatsu -regular internal pressure)  "6層" (6so - 6 ply rating)

"昭和18年12月製" (Showa 18nen 12gatsusei - manufactured December 1943)

And finally a beautiful Nakajima Ki-27 "Nate" wheel. Note the colours!!!