Friday 31 October 2014

Nakajima G8N "Renzan" (Rita) #2 - Photos

Prototype Number 4 found at the Nakajima plant in Koizumi, Gunma prefecture. This was the one that was brought back to the USA for testing. All photos from NARA.
Three photos of Prototype Number 2 found in Misawa base, Aomori Prefecture. It suffered serious damage on the fuselage, as can be seen in the photos, when it was strafed during an air raid. 

Thursday 30 October 2014

Nakajima G8N "Renzan" (Rita) #1 - Bibliography

The Japanese bibliography of the Type 18 land-based attack aircraft or Nakajima G8N "Renzan" (Rita) is really sparse.
 
There is the old Blue FAOW #90 published in October 1977 by Bunrin-do on the "Renzan" and the Nakajima G5N "Shinzan". 
 
Which was reprinted a few years later in November 1984 with a different cover as No. 146.
 
The only other publication worth mentioning is issue 680, September 2000, of the magazine "Aireview" which includes multi-view detailed drawings of the aircraft in 1/72, with English captions, by long-missed artist Matsuba Minoru. Most helpful to modelers. 
 
Very small numbers of the above out-of-print publications are available through our site.
Email us for availability and prices. 

Tuesday 28 October 2014

IPMS-​Hellas 33rd C&E 2014

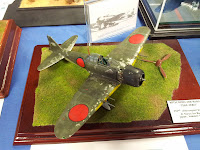
Celebrating the "Ohi day" we feature today photos of the Japanese aircraft models in 1/48 that participated in the "33rd C&E" of IPMS-Hellas that took place October 2-5. All photos by Panagiotis Koubetsos. Efharisto poli Pano and special greetings to President Megas Tsonos (if you don't know who he is, check HERE for a small sample of his art). Many many more photos from the exhibition, HERE.

This quite weathered Zero was built by Dimitris Palasis and received a commendation.
 
Another Zero but the name of the modeller is currently unknown.

The Nakajima "Gekko" was built by Yorgos Yanopoulos.

The Mitsubishi "Sonia" below was built by Alexandros Agelopoulos and won silver medal.

Saturday 25 October 2014

Captured "Betty" by Vance Gilbert

The Mitsubishi G4M "Betty" is 43” wingspan, swinging 7.75 inch propellers. It is all balsa and tissue. The plastic canopy and fuselage nose, tail, and bulges were vacuuformed in my kitchen out of light and thin clear plastic sheet acetate, the window framing done with 1/16th inch tissue strips backed with a plastic/Elmer’s type glue called Sobol. Known to many in the Radio control world as RC 56.  The empty weight of the aircraft is 85 grams - it was a real exercise in keeping things light. Best flight of it’s career is 75 seconds.
It is currently in need of repair after 3 successful seasons. I broke the wing taking it out of the car about 2 years ago. She’ll be back in action next year, with any luck.
Vance Gilbert - Massachusetts, USA
 
 
And here are two brilliant videos with Betty gracefully and beautifully taking to the air at the 2009 Flying Aces Nats, Geneseo, NY in 2010! Thank you so much Vance for sharing your Betty with our blog. Wish we had more Japanese planes like yours featured here.


Thursday 23 October 2014

Gliders - Kyu-Te Model 5 Secondary Glider "Aso-go"

The Kyu-Te Model 5 Secondary Glider "Aso-go" was designed and built by the shipbuilding faculty of the University of Kyushu; called at the time "Kyushu Teikoku Daigaku" (Imperial Kyushu University) and therefore the "Kyu-Te" part of the name. The only example of the type, with the civilian designation J-BCYH,  started to be built in early June 1933 and was completed in the middle of August of the same year. 
 
The first flight was on August 27 near Mount Aso, Kumamoto prefecture (don't forget to take a look at the Wiki link) from where the glider took its name. In the cockpit was the famous Japanese glider pilot Shizuru Tadao and the 20 minute flight established an unofficial national endurance record.
 
"Aso-go" next to another Kyu-Te glider, Model 3 Secondary Glider "Jumonji-go" J-BCAH 
 
 After the first flight pilot Shizuru is standing in front of "Aso-go".
 
On August 2, 1934 Count Fushimi Hirohide visited Kyushu University for a close inspection of the glider. In the photo below starting from the right is Count Fushimi's aide-de-camp, professor Shogenji principal of the engineering department of the university, professor Hashimoto, Count Fushimi and associate professor Sato Hiroshi main designer and responsible for the Kyu-Te Model 5 glider programme.
 
 
On September 11, 1934 at 12:37, again with Shizuru Tadao in the cockpit, "Aso-go" took off again and soared for 1 hour, 26 minutes and 10 seconds, covering a distance of about 50km and reaching a height of about 830m. It was the first time the 1 hour record for a secondary glider was broken in Japan.  


The map below shows the record flight.
 
The area where Shizuru landed is called Kuju highlands and there is a monument commemorating the flight. The area is still used for gliding by Japan's Student's Aviation League. (photo from here)

Tuesday 21 October 2014

Kawanishi H6K "Mavis" by Mark Jahsan WIP#3

As I said in a previous post, people build for different reasons. When there’s debate about different styles, it’s usually derogatory, with “rivet counters” on one side, and whatever the other guys are called on the other. Too bad, I think that’s the wrong attitude- I think we should be able to appreciate all kinds of styles.
  The builds going on here are two good examples of differing styles. Panagiotis is a freak, and I mean that in a good way! He’s what I would call a Technician, and having followed several of his builds, it’s easy to see he’s developed a style and a method that works for him to produce an incredible amount of detail- he’ll have something that’s totally unique, and totally his own.
  I consider myself more of a Craftsman. I get my enjoyment working with difficult kits and figuring out solutions. I’ve also figured out a system that works for me, and in the end gives me something totally unique and totally my own- I’ve never seen a 1/48 Mavis, either in person or online!
  Today’s update is a good example of figuring out a solution, how to attach the tail. The vacuform kit is a smooth fuselage, with no indication of where the tail mounts- locating pins? What are those???
As you can see in the picture, first step was to saw off the top of the tail. The tail feathers are all flat pieces, with faint scribing for the moving surfaces. All those were cut out and built up, with beveled edges so they slot together cleanly when reassembled. The half circle cutouts on the tail are for clearance for the sprue spars.
  Same procedure for the vertical surfaces. Slots were cut in the top of the horizontal stabs, then triangles of scrap were glued in through them to the bottom surface. The fins were filled with Milliput and squished over the triangles and glued down.
The second picture shows it just set into place. The fit is as good as you make it, and I take pride in doing what few others attempt.
When I’m not working on the big pieces, I like to set them up, keeps me motivated to keep going!

WIP#1, WIP#2

I absolutely agree with you Mark. Personally I find all the models on this blog (except mine) at least inspirational and a challenge for every one of us to do better. Even though they are certainly intimidating, I've never considered Panagiotis's models to be the "ultimate" on any subject and certainly not prohibitive for someone else to try. On the contrary I think they offer plenty of ideas as to what is possible just as your excellent Mavis does. So do keep up the good work! 

Sunday 19 October 2014

A6M7 "Zero" - San Diego Air and Space Museum

Our good friend Devlin Chouinard visited San Diego, California last week and sent us the following report and photos.
  
The San Diego Air and Space Museum houses some unique and rare aircraft, and that description fits the A6M7 hanging for the ceiling. On loan from the National Air and Space Museum, it was restored by SDASM volunteers and put on display in 1984. It is also mentioned that the aircraft served with the Yokosuka Naval Air Group. (Tail marking “yo”-143)
 The restoration looks reasonably good although it's hard to say how much of the plane is original. The underside of the tail looks rather rough, so this might indicate original aluminum skin. As it is displayed overhead, it's hard to get an idea of the upper surfaces, especially the wings. Maybe one day I can persuade the museum staff to let me have access to a stepladder?
I leave color accuracy to others, being indoors under artificial light makes this impossible to determine. However under the current lighting conditions, it looks the part.
 If you happen to find yourself in San Diego, California, pay a visit to the SDASM. They have plenty to look at, including a nice selection of Japanese aircraft models and relics, both will be featured later.
-Devlin Chouinard

On to the photos.....  


Friday 17 October 2014

Wednesday 15 October 2014

Civilian Nakajima E4N2

Many of the older IJAAF and IJNAF types of the '20s and early '30s were given to civilian operators once they were replaced by more modern  types. Once such Navy type was the Navy Type 90-2-2 Reconnaissance Seaplane or Nakajima E4N2 with the civilian registration J-BABP
As I'm sure you know, fish play a very important part in the Japanese daily cuisine and consequently the Japanese fishing industry is of vital importance (more on the subject, here). Locating fish in the vast Pacific ocean is a tricky business even with today's technological developments. 60-70 years ago was even more difficult and therefore the experimental fishery station in Shizuoka put into use a Nakajima E4N2 which was named "dai 9 giyugo" ("giyu" can be translated as "loyalty and courage"). Interestingly the particular seaplane was modified to carry a crew of three (the military E4N2 had a crew of two), pilot Terakawa, radio operator Ebihara and a fisherman who was to spot the large fish schools of bonito. Bonito is a fish that is plentifully found in the sea around Japan using the spots where colder and warmer water currents meet as well as travelling around bigger islands. The biggest bonito fishing spot in Japan is the Tohoku region (the area where the disastrous earthquake and tsunami hit in March 2011) and the second is the area starting from Shimizu, where the airplane hangar was located, continuing towards the Izu Peninsula and all the Izu Islands
When the fisherman/observer spotted the schools of fish, the radio operator transmitted a detailed report with the fish movements about every 20 minutes to the fishery station and also placed a map with information in a can which he threw from the plane to the passing fishing boats.
Below is a collection of photos from a vintage magazine describing how the aircraft assisted with the fishing. 
At the end of the day's operation the floatplane is carried back to the hangar. The scantily clad crew member is wearing traditional Japanese underwear called "fundoshi".
The radio operator's seat. Note the message can next to the seat and the rear passenger's foot.
The radio operator is ready to drop the message can...
...and the appreciating fisherman wave to the floatplane.
 
A rich catch at the Shimizu fish market.
One of the messages included in the can with a map detailing the fish movements around the Izu Islands.